Welcome to our Community
Wanting to join the rest of our members? Feel free to sign up today.
Sign up

New solaris Hull bebop 2 mod

Swordfish

Well-known member
Joined
Nov 5, 2020
Messages
52
Reaction score
6
hello guys.
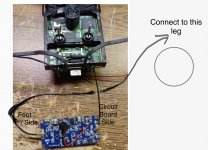
how did you connected the booster hull mod? The hull bring one special cable that goes to the main antena on the motherboard of bebop 2, and the other antenna slot on the hull where is connected? it says to drone fett antena, but there are two feet antenas. please helpp! have a nice day
 
Here you go Swordfish,

Hope this helps, let us know if you need additional help. We’ll do our best to help out, good luck.

Pau

Here you go Swordfish,

Hope this helps, let us know if you need additional help. We’ll do our best to help out, good luck.

PaulView attachment 5429
Thanks Paul ! You are Big! Thanks! I did that way ? i tested the wifi connection and it gaves me -12db at 5 meters indoor.
Nos the hard part, i have ti put the booster on mi sk2 (black sticks) that is going to be harder for me. Could You help me out with that one? Thanks Paul, sorry for bother. And gretings from Uruguay. Have a nice day
Hello Swordfish,

Glad to hear you had the drones booster connected correctly, that’s the first step with controller mod next.

With the black sticks controller you have, their are two different type black stick controllers both completely different form the other. One has a small cylinder battery, the other has a larger square battery. Both of these are assembled differently, one requires more soldering and can be a challenge to complete.

Please share which of the two battery type controllers you have, small round cylinder battery or larger square battery.

We can go from there, Solaris the maker of this great Bebop 2 mod has videos showing the mods.

Keep us posted,
Paul
 
  • Like
Reactions: Swordfish
Hello Swordfish,

Glad to hear you had the drones booster connected correctly, that’s the first step with controller mod next.

With the black sticks controller you have, their are two different type black stick controllers both completely different form the other. One has a small cylinder battery, the other has a larger square battery. Both of these are assembled differently, one requires more soldering and can be a challenge to complete.

Please share which of the two battery type controllers you have, small round cylinder battery or larger square battery.

We can go from there, Solaris the maker of this great Bebop 2 mod has videos showing the mods.

Keep us posted,
Paul
Hello again Paul
I have the blackstick with the cilinder battery. I have the PDF instructor, but ir is not enough for mi knowledge :( Hope You could help me out. Thanks again
 
Hello again Paul
I have the blackstick with the cilinder battery. I have the PDF instructor, but ir is not enough for mi knowledge :( Hope You could help me out. Thanks again
Great! The controller with cylinder type battery is much easier to complete the controller mod, this is good.

I’m not home at the moment, will try to post pictures tonight or tomorrow showing the controller mod same as yours. With your particular mod, the power source will coming from the USB port. You’ll need to solder positive and negative wires to this port. This can be tough to do, Need a steady hand.

I’ll get back with the information/pictures you need, until then please review any information or videos from Solaris.

Hang in there
Paul
 
Ok Paul i Will whait for your instructions. Iam just going to dissasembly the controller and whait for ir. Thanks again paul?
 
  • Like
Reactions: Waldo Pepper
Great! The controller with cylinder type battery is much easier to complete the controller mod, this is good.

I’m not home at the moment, will try to post pictures tonight or tomorrow showing the controller mod same as yours. With your particular mod, the power source will coming from the USB port. You’ll need to solder positive and negative wires to this port. This can be tough to do, Need a steady hand.

I’ll get back with the information/pictures you need, until then please review any information or videos from Solaris.

Hang in there
Paul
Hello again Paul sorry to bother you. I have dissasembly the skycontroller, but Iam not an electronic guy. I asked solaris but he is not helping me out :( . Thanks for your time
 
  • Like
Reactions: Waldo Pepper
No problem Swordfish,

I’m a little behind here, A few priorities surfaced here at home and outside.
Bear with me, I’ll get the information and pictures you need to help you complete the controller mod.

Hang in there, have patience I’ll post what you need if not tonight in a day or so. Maybe others will chime in to help, if not bear with me I’ll do what I can.

Paul
 
No brother Swordfish,

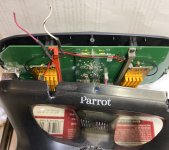
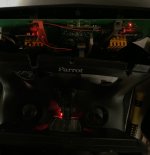
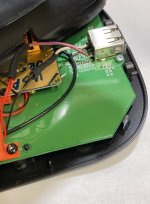
I made time to put this together this early evening, had a spare black controller like yours and another Solaris booster set to complete the mod. Took about an hour, took pictures along the assembly. Tried to express the work from pictures, each step to soldering the final step (positive/negative) wires your USB port. Just remember, positive wire is soldered to upper USB port pin, negative wire soldered to lowest USB port pin.

Careful not to over solder in this area, you can damage the board if excess solder sweeps onto mini components beside USB port. However, if you do damage board, just order another Same like controller from eBay. Solder these two leads last, after amplifiers are mounted onto antenna panel.

Below, follow each step by picture. Unfortunately, I uploaded them by order but they are not in order.

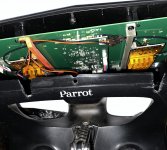
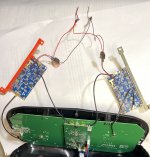
Before mounting boosters to controller panel, note how the boosters are arranged with antenna cables connected. This is the proper antenna cable arrangement, then flip them opposite so cables are between boosters and antenna panel. Then, carefully remove panel screws and remount with attached booster brackets. Two booster amplifiers, each with its own bracket.

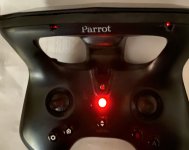
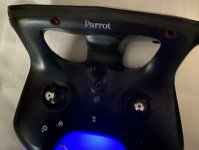
Also, I like to drill or cut two small holes above booster amplifiers, I can visually see they are on with the red glowing lights when controller is powered on.

Have to leave here in a few minutes, Hope this helps. Please follow these steps, take your time. And if you damage the controller, just get another one.

Good luck, and relish the time spend working with your hands completing the mod.

Paul

B3D9EE47-87D4-4FCF-A2B4-660134402921.jpegB3D9EE47-87D4-4FCF-A2B4-660134402921.jpegAABEE25A-AA1E-4F88-9247-5D605251D52E.jpegE34C76DC-3143-461D-88F8-E8A73B850B90.jpegD3F7E9C3-7B71-43EF-B761-E8562E82F536.jpeg3EE6FFE5-A17B-4493-A11F-0FADBB09F43B.jpeg1991A66B-67BE-4F1F-9A86-2FFA6A2EAB5E.jpeg
 
  • Like
Reactions: Swordfish
Here’s another booster SkyController 2 with Solaris mod, this one I drilled out two small holes to show the mini red lights from inside.

Good luck!
Paul
55EC0F14-3304-4FD1-A352-CD7FF9909372.jpeg
 
No brother Swordfish,

I made time to put this together this early evening, had a spare black controller like yours and another Solaris booster set to complete the mod. Took about an hour, took pictures along the assembly. Tried to express the work from pictures, each step to soldering the final step (positive/negative) wires your USB port. Just remember, positive wire is soldered to upper USB port pin, negative wire soldered to lowest USB port pin.

Careful not to over solder in this area, you can damage the board if excess solder sweeps onto mini components beside USB port. However, if you do damage board, just order another Same like controller from eBay. Solder these two leads last, after amplifiers are mounted onto antenna panel.

Below, follow each step by picture. Unfortunately, I uploaded them by order but they are not in order.

Before mounting boosters to controller panel, note how the boosters are arranged with antenna cables connected. This is the proper antenna cable arrangement, then flip them opposite so cables are between boosters and antenna panel. Then, carefully remove panel screws and remount with attached booster brackets. Two booster amplifiers, each with its own bracket.

Also, I like to drill or cut two small holes above booster amplifiers, I can visually see they are on with the red glowing lights when controller is powered on.

Have to leave here in a few minutes, Hope this helps. Please follow these steps, take your time. And if you damage the controller, just get another one.

Good luck, and relish the time spend working with your hands completing the mod.

Paul

View attachment 5431View attachment 5431View attachment 5432View attachment 5433View attachment 5434View attachment 5435View attachment 5436
Thanks Paul! You are awsome! Iam wating the bus to go to mi house and i Will follow your instructions. Thanks for everething i Will post the results later, You are Big ! Really thanks for your time! Hope this help other people too.
Thanks
Gonzalo
 
  • Like
Reactions: Waldo Pepper
Hello
Thanks Paul! You are awsome! Iam wating the bus to go to mi house and i Will follow your instructions. Thanks for everething i Will post the results later, You are Big ! Really thanks for your time! Hope this help other people too.
Thanks
Gonzalo
Hello Gonzalo,

I’m glad to hear this may be helpful for you, please note originally I uploaded the pictures in order but for some reason they are not in proper order.

Take your time, the most critical part of this mod is soldering the two positive/negative leads to the USB port. Need a steady hand, take your time with this final part of assembly.

Enjoy the mod assembly, it’s actually fun to complete.

All the best,
Paul
 
Ok Paul i Will try yo enjoy the build jaja
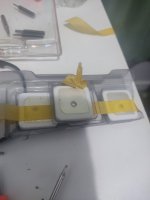
I have to install those things? (Attached picture) or those are for another type of controller?
IMG_20210310_232913.jpg
 
Hello Gonzalo

Those are patch antennas, different type of
SkyController 2. I see now, you have the first version SkyController 2 with black sticks with original inside components.

This particular controller, the power source is soldered onto the mother board itself. Plus, you need to cut 4 trace leads and then solder on the small mini antenna connectors.

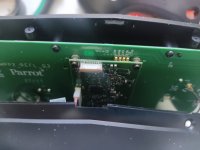
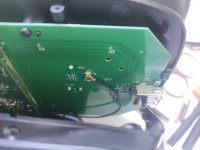
Hold off, don’t use my picture instructions as these apply to the second version SkyController with black sticks. Please don’t start the mod, and can you post pictures of the inside antenna portion of your controller. I want to see what we’re working with, please don’t attempt the mod for now.

We’ll figure this out, hold off on the mod for now.

Paul
 
  • Like
Reactions: Swordfish
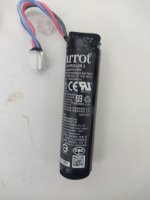
Normally, The patch antenna controller uses the square battery.

You mentioned yours uses the round cylinder type battery, this applies for the Controller without patch antennas.

I have both versions, so I can help but first show a picture or two of the inside of your controller.

We’ll figure this out,
Paul
 
Hello Gonzalo

Those are patch antennas, different type of
SkyController 2. I see now, you have the first version SkyController 2 with black sticks with original inside components.

This particular controller, the power source is soldered onto the mother board itself. Plus, you need to cut 4 trace leads and then solder on the small mini antenna connectors.

Hold off, don’t use my picture instructions as these apply to the second version SkyController with black sticks. Please don’t start the mod, and can you post pictures of the inside antenna portion of your controller. I want to see what we’re working with, please don’t attempt the mod for now.

We’ll figure this out, hold off on the mod for now.

Paul
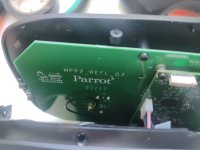
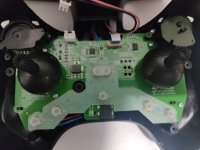
Hello Paul, i think solaris senda the complete kit for any skycontroller 2. I have attached photos of My skycontroller for You to seeIMG_20210311_073143.jpgIMG_20210311_072414.jpgIMG_20210311_072359.jpgIMG_20210311_072405.jpgIMG_20210311_072237.jpg
 
Yeah, thats the black stick version, I answered your question on the other thread. The white square things are the ceramic antennas for the original version. You won't be using those. I posted pictures in your other thread about installing the kit on that controller.

Apparently he is including them now with the kit, Shame, I have one controller that uses these antennas and maybe replacing them would improve it more.
 
Hello Gonzalo

Okay, You’re good to go you have the right Controller 2 pertaining to the pictures I included. Take your time, especially soldering positive/negative wires to USB port. Disregard those patch antennas Solaris included with the kit, since your controller doesn’t use this type of antennas.

And thanks Mike for chiming in, every bit of additional information is a plus. Plus, I don’t think changing the antennas will improve transmission signal, the ones included with Gonzalo’s kit. Yours are good, I have both types of controllers each with Solaris kits.

Good luck Gonzalo, keep us posted.
Paul
 
Last edited:
  • Like
Reactions: Swordfish

Members online

Forum statistics

Threads
5,305
Messages
45,087
Members
8,002
Latest member
lustar