
Hi @epysod12,Hi @looninho,
Thanks for sharing your QGC flightplan.
I realize that my script requires a typical mission like this:
Mission StartTakeoffSurveyReturn To Launch
For the last command, the script reveals my own vision: the Return To Launch command (MAVLink code: 20) is the most appropriate to get the drone back to the starting point.
If we indicate a Land command (MAVLink code: 21), the script crashes miserably...
Now, your questions:
1) Do we need to connect Anafi 4K to QGC to create flight plan?
No, we don't need to connect Anafi to QGC (via WiFi).
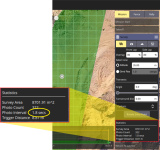
2) for the camera selection Sony > IMX230 doesn't exist in QGC, so Parrot > Sequioa RGB is right?
IMX 230 is not listed in QGC, but we can enter the values manually, like this:
View attachment 6452
Hoping to have helped you on these points (a bit technical), don't hesitate to make any other comments if you wish!
epysod12
Thank you for your reply and for your camera parameters.
As I don't have the In-App FlighPlan for FF6, I'll try to convert your code to output MAVLink file for use with the Android app given in Parrot Developers Github.
Loony