Welcome to our Community
Wanting to join the rest of our members? Feel free to sign up today.
Sign up

All Video Styles & Yellow Wild Flowers

justDee

Well-known member
Joined
Apr 7, 2019
Messages
119
Reaction score
49
Location
San Antonio, Tx
Website
youtube.com
The field behind my land is in full bloom with yellow wild flowers. Without a filter, in 2.7K @ 24fps, I thought I'd park the Anafi at 46' and just run through all of the video styles and see what happens. I have not watched the footage on an HD screen, just my iPhone XS and my older PC monitor, so it's difficult for me to tell just how clear the images are, so I will have to play it back on a better screen for me to see the differences in settings.
It was more sun than clouds, between 4 - 5PM in the afternoon. I was shooting to the SE, so the sun is still fairly high and to the right of the screen.

 
The Histogram is important in relating these various exposures to each other. All the styles do is work as a preset to get certain effects without manually changing ISO and shutter speed. If you watch the histogram and record the changes in ISO and shutter speed when changing styles you will get a pretty good idea of what they do. I don't use them much at all.

As you can see, when the peaks in the histogram are more or less in the middle the exposure is close to correct for that subject, in this case green and yellow vegetation. If you were taking a picture of snow, you would want the peaks to be most of the way to the right. It's a bit easier to see with a decent digital camera because you can use the zoom to isolate certain areas. Back in my aerial photography days I used a grey card a lot. That let me set the exposure so that the grey card actually showed up as grey in the middle of the histogram (which didn't exist back then) But if grey was gray, then white was white and black was black in the print. Fine for bright sun, but if you wanted detail in darker areas you had to increase the exposure and let any whites get overexposed. Generally, in vertical aerials, the ground was similar in value to a grey card and I almost always used the same speed and aperture time after time. Film speed (ISO) was fixed at 100 for 99% of the few film types I used. This holds pretty much true for drone verticals too. If the result is too bright, set -1 EV, if it is too dark, set +1 EV and let the camera do the rest. Being able to preview before shutting down is great for that!

Since we don't have a variable aperture, we can only set ISO and shutter speed to get what we want. Setting a 1 stop lower EV value is the same as doubling the shutter speed....which is also 1 stop lower exposure value. This is why I use EV compensation most of the time: it is faster, simpler, and more accurate than changing shutter speed and ISO. I only have to look at one place on the screen, poke it, and then poke the +1 or - 1. Rarely would I go beyond 1....snow might need +2. If I was wandering through a deep forest and wanted to make it look creepy I might go as far as -2.

The human eye has a far greater ability to see brighter whites and darker blacks simultaneously than any camera ever made, so when shooting hi contrast subjects, you have to choose which part of the subject you want to be exposed to which value....most of the time that is the middle values....trees, flowers, skin, etc. but if it is beach sand or snow you would want it bright, which would underexpose everything else.

Your eye is a pretty good judge of exposure value, since you have seen millions of correctly exposed photos in your life. It's easy to get all wrapped up in the technicalities, but remembering just three things will get you better drone photos and video: Bright subjects should appear bright, dark subjects should appear dark, and if you want moving subjects to look like every movie shot you have ever seen use an ISO of 100 and a shutter speed of 1/50. If your subject is not moving you can shoot at any speed. You still have to decide if the footage is too bright or too dark and compensate with EV.
Thank you Sir, I know that took some time to type that out, but I appreciate it very much.
 
You are welcome! I hope it shed some light on the idea of exposure value and how it relates to what the eye sees as a good exposure. :) (which of course can vary significantly depending on the mood you want to convey).
 
It’s pretty amazing how much the grid, histogram, and exposure zebra help especially with your DNG photos. While I like the video results of the Anafi, the sensor cropping for the zoom feature frustrates me a bit because I really like 60 fps but of course you lose the zoom when you switch to it.

The pro camera controls I think are logically laid out and easy to access and with my G8+ I have lots of screen for proper look of center, frame, and focus even with the controls on screen. It’s my only travel drone and proved itself beyond worthy the other morning on a shot I got of sunrise looking up river towards downtown New Orleans. I held hover position for 18 minutes and got more then I hoped for. The zoom was my main motion move for subtle push ins and pullbacks but I let the light, the river below, ship traffic, and sunrise off the buildings do the action.

The bottom line is the Anafi allows for patient and determined cinema shots and pro photos that rival high end SLRs from angles and perspectives that earthbound cameras cannot achieve. I believe Ansel Adams would have owned one if he was alive today because of these features plus its quiet, non threatening profile does not disturb you or nature.


Sent from my iPad using Tapatalk Pro
 
  • Like
Reactions: Jagerbomb52
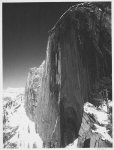
Ansel? With a drone? Very interesting thought. Some of his shots of Yosemite look like they could have been shot from a drone....he got pretty close to the edge of some of those cliffs! Now there was a real master of high contrast subjects, but he did it by exposing for the highlights and then burning in the shadows when printing:
2014

Also amazing to think we can now get an image approaching that of an 8x10 camera out of something the size of a golf ball!!

I had forgotten about the exposure zebra when writing the above to Dee. It's actually a great tool for setting EV value on the fly for high contrast subjects. It's under camera settings > display overexposure.
 

Members online

No members online now.

Forum statistics

Threads
5,313
Messages
45,116
Members
8,013
Latest member
Ritchh